Gluten free vegan chocolate fudge cake with coconut cream and berries [VEGAN]

dairy free, Desserts, gluten free, vegan

I love this cake with all my heart.  It is everything I yearn for in a cake – soft, fudgy, chocolatey, light, low fat and healthy.  Wait, did I say healthy?  How can a chocolate cake be healthy?  Yep, it totally can be! Discovery of this cake was a pure accident.  It was late in the evening, my brain could not absorb ophtalmology any longer and was begging for sugar (as it always does). I went to the kitchen to bake something but found out I was pretty much out of all my usual baking supplies.  I did find oats and coconut cream and a bag of berries in the freezer and came up with this (what was later going to become) the favourite chocolate recipe of me, my boyfriend and friends.  The light coconut cream and the tart berries balance the fudginess of the cake really well, resulting in the most perfect chocolate cake.  So without further ado, let’s get into the recipe:

RECIPE:
(makes one small cake, serves 6)

For the dough:

  • 1 cup oatmeal, ground into flour
  • 1/3 cup tapioca starch
  • 1/2 cup cacao powder
  • 1 tsp of soda
  • 1/8 tsp of xanthan gum
  • 4 tbsp ground linseed (flaxseed) mixed with 1 cup of warm water
  • 2/3 cups of sugar
  • 1/2 cup of oil
  • 1 small beetroot, cooked in boiling water until soft (don’t worry, you can’t feel the taste of beetroot in the cake!)
  • 1 tsp gingerbread spice (replace with vanilla or just cinnamon if you prefer)
  • pinch of salt

For the topping:

  • 1 can thick coconut cream left overnight in the fridge or a couple of hours in the freezer
  • 1 cup berry marmalade

METHOD:

Combine all the dry ingredients in a bowl except the linseed.  Mix through.
Combine the linseed with water in a separate bowl.  Mix through and let it sit for a few minutes to form linseed jelly.
Peel your beetroot and grate it on the side of your grater that makes fine pieces.
Combine your beetroot, linseed jelly and oil.  Make a well in the dry mixture and slowly pour your wet mixture into it, mixing it thoughout until well combined.
Divide the dough into two parts.  Pour each part into a greased cake tin lined with parchment paper (I used an 18 cm/7 inch cake tin).
Bake at 180 ºC/356 ºF for 40 minutes, or until the skewer inserted into it comes out clean (the centre should be a little runnier than the sides, that’s okay).
Let the cake cool completely.

In a clean bowl, scoop out the coconut cream and whisk it with a hand whisk, until soft and creamy.
Spread half of the marmalade onto the first layer of cake, then put on half of the cream.  Put a second layer of cake on top and spread with coconut cream and then put dollops of marmalade on top of the cream.

This cake is delicious straight after baking but I found it even more delicious after I’ve refrigerated it overnight.  You cannot feel the taste of beetroot in the cake but it gives this fudginess and moist and the cake just completely melts in your mouth.  Heaven in a spoonful.

Take care of yourself and your loved ones and cook them healthy food you know they will enjoy!

Much love,
Jalia

DORTÍK 1

Rich and dense gluten free bread with molasses [VEGAN]

gluten free, low fat, vegan

12141576_10156166552630594_4047237557838792230_n

Ever wondered if you’ll be able to eat a dense dark rye-like bread on a gluten free diet?  A bread without harmful additives that is.  The answer is yes!  And I’ll gladly show you how.

Now a little pre-history here.  I’ve been on a gluten free diet for almost a year now and one of the things I missed the most about my previous diet was rye-bread.  Rye bread with salt and butter.  I’ve tried buying gluten free bread on many occasions, each time hoping for a real thing.  Instead, what I got was something I could hardly call bread.  Stale, packaged months or years ago, foul smell and the feeling I got after eating it was just not right.  So I gave up bread and convinced myself I can live without it.  Until I discovered this bread.  Its rich dark flavour reminds me of rye bread and the chewy texture goes really well with vegan dips, butter or cream cheese.  I eat it with pretty much everything now.  The molasses add in a hefty amount of important minerals such as iron and magnesium which are so important especially for vegans and vegetarians.  The psyllium husk is incredible for keeping your bowels clean and happy.  And as you might know, clean bowels = happy body.

RECIPE:
(makes one small loaf)

  • 1 1/2 cups of certified gluten free oatmeal, ground into flour (use ready oatmeal flour if you prefer)
  • 1/2 tapioca starch
  • 1 tsp baking soda
  • 1 tbsp Psyllium Husk
  • 1 tsp Himalayan pink salt
  • 1/3 cup sunflower seeds
  • 5 heaped tbsp of crushed linseed (flaxseed)
  • 1 cup of hot water
  • 1 tbsp of blackstrap molasses
  • 2 tbsp of sunflower seeds to sprinkle on top

METHOD:

Preheat your oven to 200 degrees Celcius (392 degrees Fahrenheit).
Mix all the dry ingredients in a large bowl.  In a separate bowl, mix together the linseed with the hot water and add in the molasses.  Set aside for a few minutes until the linseed becomes jelly-like.  Make a little well in the centre of the dry mixture and add the liquid mixture to it.  Mix through until it forms a somewhat sticky dough.
Line your baking tin with parchment paper and push the bread mixture in it with slightly moist hands, making sure it’s spread out nice and evenly.
Bake at 200 degrees Celcius for 33-40 minutes.
Take the bread out of the oven and let it cool completely before slicing into it.

The edges of the bread turn out crunchy while the inside is soft and chewy.  Now I’m off to enjoy a slice slathered in salted butter.
Good luck and bon appétit!

IMG_20151022_174358

Butter and apricot jam, cream cheese and cucumber, baked aubergine dip

Watch my Youtube video: https://www.youtube.com/watch?v=0DiPj8ZzfMw

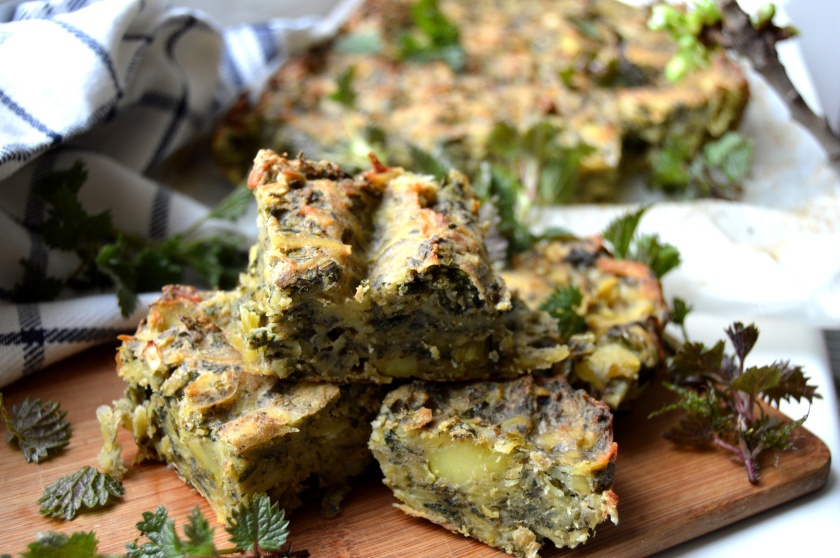
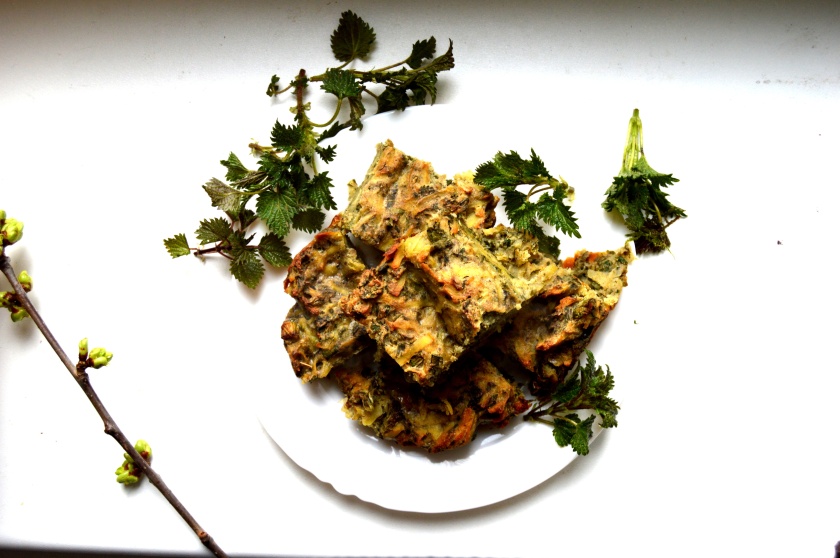
Czech Easter Savoury Nettle Pie (Nádivka)

baking, dairy free, Easter, gluten free, Uncategorized, vegetarian

Hi friends!
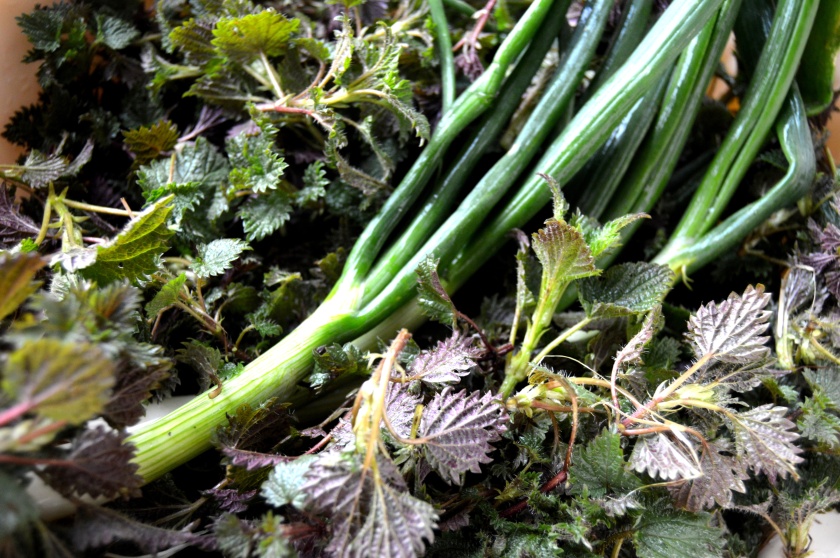
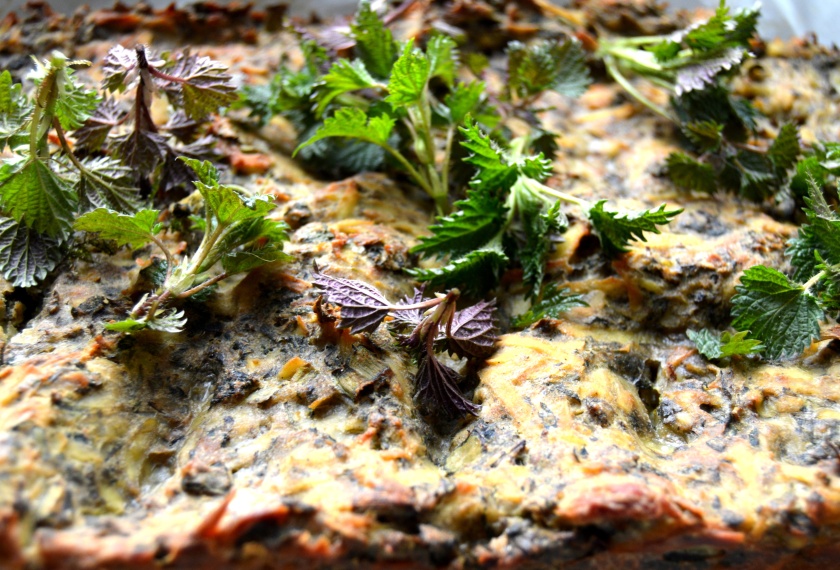
Long time, no see, eh?  Sorry for that!  Fifth year of medical school is proving to be the most difficult one and I’m studying for exam after exam with little time to spare for anything else.  But thankfully, I did get my butt off the chair for a couple of hours today to take a much needed break from books and to have a nice walk in the forest.  The weather in the Czech Republic is still quite chilly and humid, but you can definitely feel spring in the air already!  The birds are chirping and fresh nettle is growing all over the forest so I decided to pick some and make a traditional Czech Nettle pie for Easter.

Nettle is widely known for it’s amazing array of health benefits when drunk as a tea but  there are not so many recipes using nettle in food.  Nettle is one of the most powerful iron sources in the vegetable kingdom and is amazing for people with anemia. It makes your hair and nails thicker, stronger and shinier, skin clearer and generally greatly detoxifies the body.  Nature always gives us its gifts at the right times of the year, so fresh nettle leaves that start growing in spring can aid us very well in the detoxification of our body and supply us with vitamins and minerals that we are surely missing after a long, cold winter.

DSC_0093

The custom is, that the Czech people make this pie with  fresh herbs to celebrate the arrival of spring, using as many different green herbs as possible.
The traditional recipe calls for pieces of white bread to be dunked in an egg and milk mixture, mixed with the herbs and baked in an oven.  But since I don’t eat gluten and my boyfriend is allergic to milk, I had to omit both the bread and the milk and come up with something instead.

DSC_0158
I used grated potato as the main body of my pie and for the herbs I used fresh young nettle from the forest, wild green garlic, spring onions, dried marjoram and dried lovage.  The combination of these herbs is what makes the traditional nádivka taste traditional and smell divine but feel free to omit or add any other herbs that you like such as spinach, oregano, thyme, etc.

One note on picking the nettle – use gloves otherwise it will sting you pretty badly!  I didn’t use any and now I’m sporting purple reddish stings all over my right palm 🙂

So, without further ado, let’s get baking!

DSC_0107

DSC_0124DSC_0166

RECIPE:

  • 2 kgs starchy potatoes, peeled, washed and grated
  • 200 grams of fresh young nettle, washed and chopped (use gloves while chopping too)
  • 4 spring onions, chopped
  • 2 bunches of wild garlic
  • 3 tbsp dried lovage
  • 2 tbsp dried marjoram
  • 5 eggs
  • 2/3 cup of corn flour
  • 2/3 cup of buckwheat flour (feel free to substitute with more corn flour but the corn flour is essential – it’s what will make the edges super crunchy)
  • 2 tbsp of cold pressed sunflower oil
  • salt and pepper

METHOD:

  • Preheat your oven to 200 degrees Celcius.
  • First, put the grated potatoes into a bowl and put about 1 tsp of salt over them.  Leave the potatoes to sweat and release excess water for 5 minutes.  Squeeze off the excess water.  The starchier the potatoes, the less water they will release.
  • To the potatoes add in the chopped nettle, spring onions and the wild garlic.  Mix through.  Add the lovage and marjoram.
  • To the mixture, crack in 5 eggs and the 2 tablespoons of oil and mix through.  Add in the salt and pepper and then start adding the flours until the dough reaches a medium thickness consistency (it shouldn’t be too runny but shouldn’t be hard like a pizza dough either… something in the middle).
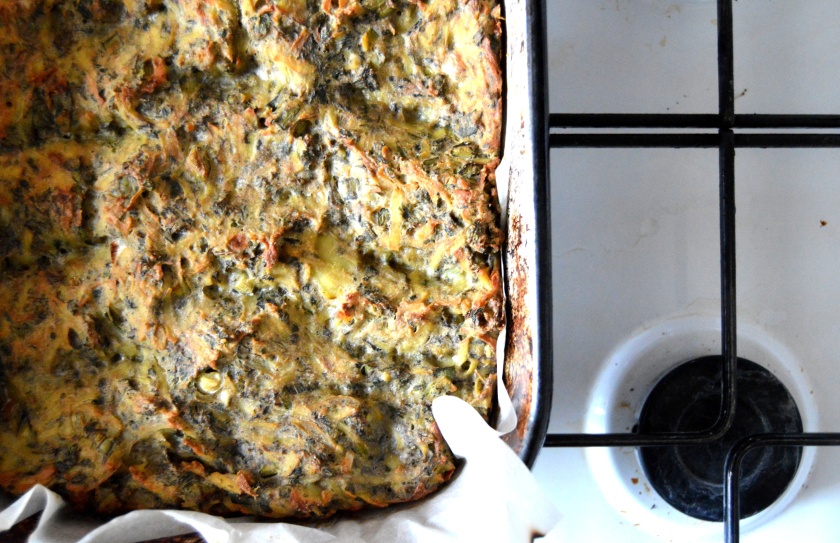
  • Line your baking pan with parchment paper and transfer your dough into the pan.  The mixture should be about 5-6 cms from the bottom of the pan.
  • Bake for an hour at 200 degrees Celcius until the top of the pie and the edges turn golden and form a crust.
  • Take out of the oven, let it cool, slice and eat either warm or cold (both are great!).

Do you use stinging nettle in any recipes?  I would love to hear from you!

With love,
Jalia


The 5 o’clock tea – Buckwheat and walnut Bundt cake [VEGAN]

dairy free, Desserts, gluten free, low fat, vegan

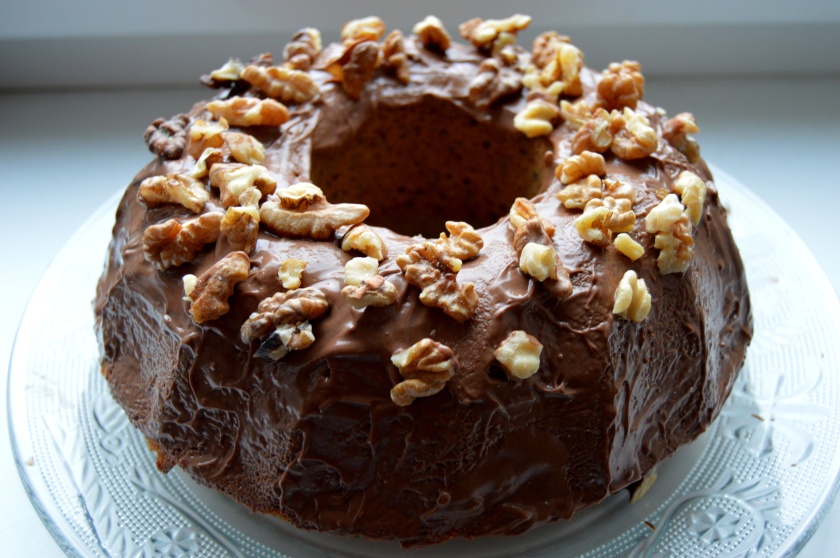
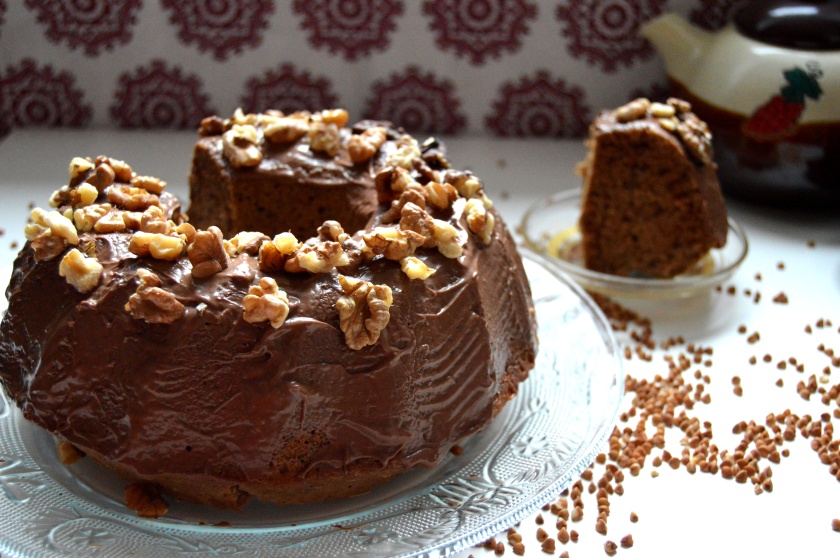
Comfort food.  That’s what we all crave, right, my little gluten free friends?  But while comfort food is associated with unhealthy ingredients, my recipes won’t let you down, that I can assure you.  Creating delicious food with clean, simple ingredients – that’s my cooking philosophy.  This is not like one of those cakes made with gluten free mixes, which usually turn out to be powdery and kind of icky.  This cake is soft, moist and filled with crunchy walnuts and glazed with chocolate.  And a sprinkle of extra walnuts for good measure.  I replaced the eggs with linseeds, the butter with oil and the milk with water and voilà!  You get yourself a pretty amazing, completely vegan cake that tastes just incredible.  I’m notorious for slicing into it while still hot from the oven and demolishing at least a fourth of it in one sitting.  And you know what, I don’t feel any guilt.  And why should I?  It’s made just out of plants.

Try something new.  Instead of having tea in the evening, make it a 5 o’clock tea.  Get your best China set out.  Porcelain is best but if you don’t have it, that’s okay, just use whatever you have (I don’t have porcelain either).  Slice the cake and serve it on plates.  Make some Earl Grey tea and gather your friends and family for a tea, cake and a little gossip. Evoke the feeling of being British for one day.  Remember, in order to be happy, we have to create the magic in our lives ourselves 🙂

RECIPE: 
(makes about 8 portions)

For the cake:

1 1/2 cups of buckwheat flour
1/2 cup of tapioca flour
2/3 brown muscovado sugar
1/2 tsp of baking soda
1/2 cup of walnuts
1 1/4 cups of hot water
1/2 cup of rapeseed or coconut oil
1/2 cups of ground linseed/flaxseed
vanilla extract

For the chocolate glaze:

150 grams of vegan chocolate
1/4 of a cup of walnuts

METHOD:

Preheat your oven to 200° C/392° F.
Combine all your dry ingredients in a bowl (except the ground linseed).
Add your linseed in a smaller bowl and add in the water.  Mix through and wait a minute, it should turn into a sort of jelly.  Add in the oil to the linseed mixture and mix through.
Combine the dry ingredients with the wet ones.  Mix through until well combined.  The dough will look sort of gelatinous, don’t be afraid.  This is the right consistency and is caused by the linseed.
Grease your Bundt cake tin with oil and pour in the cake mixture.
Bake at 200 degrees Celcius for 30 minutes, then check with a skewer.  The skewer should come out completely dry.
Take your cake out of the oven.  Let it cool completely and then decorate with some melted chocolate and more walnuts.  As an alternative, serve with cold coconut whipped cream and berry jam.

Enjoy your winter evenings, my loves.
Jalia

DSC_0747DSC_0801

Festive Cardamom Carrot Cake

Desserts, gluten free, vegetarian

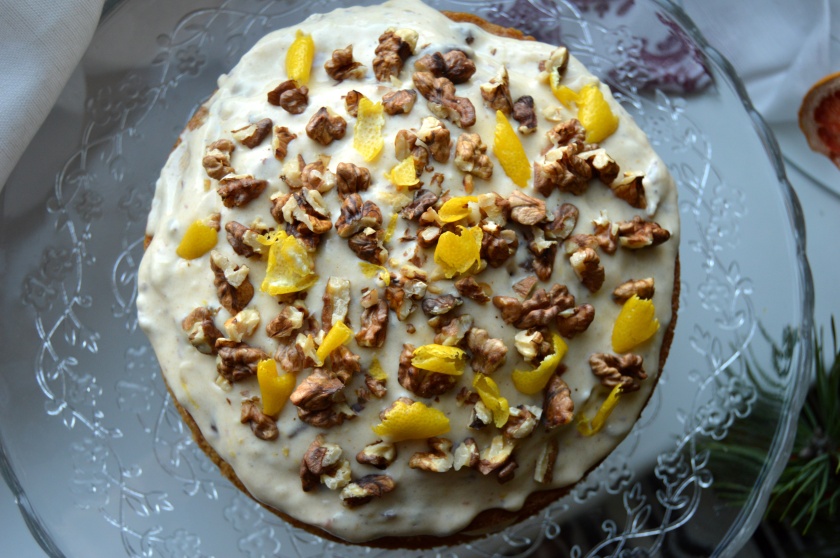
Growing up in Azerbaijan (a former Soviet Republic) New Year’s Eve was the most special night of the year.  Presents from Ded Moroz (Father Frost) were always bags filled with chocolate and tangerines and we also got some felt-tip pens with a colouring book.  I would wait for Ded Moroz all night long but towards the morning I’d always end up falling asleep and somehow he always managed to sneak in our balcony without me noticing and leave little parcels for me and my sister.  Looking back, I think those were the most magical moments of my childhood.  My Mom would cook up a feast and there was always something sweet on the table.  I don’t live with my parents anymore but I continue the tradition and this year I will be making the classic Russian salad and for dessert I chose this simple and easy to make carrot cake.  This cake is very light so it leaves a very good feeling in the tummy, the only drawback is that you will want to have more than one piece!  The rice flour and tapioca starch combine really well to make a soft spongy base and the sour cream and date paste make for a heavenly light cream.  The cardamom, cinnamon, vanilla and lemon peel add the final magical festive aroma to the cake.

carrot cake

RECIPE:
(makes one small cake – 6 portions)

For the batter:

  • 1 cup of brown rice flour
  • 2/3 cups of tapioca starch
  • 2/3 cups of brown sugar
  • 1 tsp baking soda
  • pinch of salt
  • 1/2 tsp of cardamom
  • 1/2 tsp vanilla extract
  • peel of 1 lemon
  • 2 eggs
  • 100 ml of sunflower or rapeseed oil
  • 1/4 cup of warm water
  • 1/4 cup walnuts
  • 1 large carrot, grated

For the cream:

  • 150 ml of full fat sour cream (I used 15% fat)
  • date paste (8 pitted dates blended with 2 tbsp of water)
  • pinch of ground cinnamon
  • pinch of ground cardamom
  • a few drops of vanilla extract
  • peel of one lemon

Decoration:

  • a small handful of toasted walnuts
  • lemon peel

METHOD:

  1. Pre-heat your oven to 200 degrees Celcius/ 390 degrees Fahrenheit.
  2. Combine all the dry ingredients in a large bowl.  Give it a whisk to make sure everything is combined.
  3. In a smaller bowl, add in two eggs and beat with an electric mixer  until pale and fluffy.
  4. Combine the egg mixture with the warm water and the oil and pour in to your dry mixture.  Whisk by hand or beat with a mixer until all is well combined and the batter is smooth.  Add in the grated carrot.
  5. Grease a cake tin (I used an 18 cm/7 inch cake tin) and line it with parchment paper.
  6. Divide the batter into two parts and pour the first half into the cake tin.
  7. Bake the cake for 15-20 minutes or until a toothpick inserted into the centre of the cake comes out clean.  Repeat with the other half of the batter.
  8. Let the cake cool on a wire rack and it’s time to get our hands on the cream.
  9. In a medium bowl combine the sour cream, the date paste (which is basically just dates blended with a bit of water), lemon peel, vanilla, cardamom and cinnamon.  Beat it with a whisk.  The consistency of the final cream should be thick enough to let you spread it onto the cake without being too runny.
  10. When the two layers of the cake are completely cooled, spread the cream onto both layers.  Decorate the top layer with toasted walnuts and lemon peel.  Voila!  Your cake is now almost ready and all you have to do is wait a few hours or better yet overnight.

I hope you enjoy my version of this classic cake and let me know if you give it a try, I’d love to hear from you!

Happy New Year, my dear readers!

With love,

Jalia

carrot cake š

Traditional Czech Christmas biscuits made gluten free/Bezlepkové linecké cukroví

Desserts, gluten free, vegetarian

It’s Christmas time in the Czech Republic! Almost all of the families here bake at least a dozen different kinds of Christmas treats.  It is a lovely tradition – the sweets are then enjoyed throughout the holidays and also given to family and friends as small presents.

Linecké cukroví is the most common Christmas treat, a shortcut biscuit glued together by sweet and sour jam. If you leave them for a few days (which you should, even though it’s difficult not to devour the whole tray at once!), they get slightly moist and chewy in the centre and crunchy on the side, which makes them (in my opinion) the Queen of all biscuits!

Here, I present you with my gluten free version of the biscuit which, I daresay, tastes exactly the same if not better than the original.  I substituted the regular wheat flour for rice flour and tapioca starch combo and it seems to have worked perfectly!

Surprise your family this Christmas with delicious, homemade biscuits. Enjoy them with a cup of festive mulled wine, egg nog or a simple cuppa tea!

CollageqswCollage bisDSC_0419

RECIPE:

  • 140 grams of fine rice flour
  • 70 gr of tapioca starch
  • 140 grams of butter, refrigerated
  • 2 egg yolks
  • 70 grams of powder sugar
  • zest of one lemon
  • pinch of salt
  • pinch of baking soda
  • berry jam (the smooth variety with no pieces of fruit, you can blend the jam to make it smooth)

METHOD:

  • Mix the flours, the powder sugar, the salt and the soda together in a bowl.  Add the lemon zest.
  • Dip your butter into the flour to make it less sticky and start grating it on your medium sized grater.  You need to mix the butter with the flour quickly, so that the butter doesn’t melt.  Then mix the butter with the flour, making sure there are no big lumps of butter left.  Add in the egg yolks, mix the dough with your hand to form a firm and smooth dough.  If the dough is too dry, add in 1-2 tablespoons of cold water.
  • Divide the dough into two parts.  Roll out the dough till about 1 cm thick.  Cut our your biscuits with your cookie cutter.  First, cut out the basic shapes with no holes inside.  Then cut out the same shapes but with a hole inside.  Make sure you count the ones with the hole and the ones without!  The number should be equal, because you’ll need to stick them together later.
  • Bake your biscuits at 200 degrees Celcius for 10 minutes or until slightly golden.  Let them cool completely before removing from the baking sheet otherwise they can crumble in your hands.
  • Spread the jam on the biscuit and then cover with the pair of the biscuit that has a hole in it.
  • Leave at least for a couple of hours (overnight is best) and enjoy!


Eggfree Buckwheat Wraps [VEGAN]

dairy free, gluten free, low fat, vegan

As for most of my recipes, the best ones I create by accident or some crazy experiment.

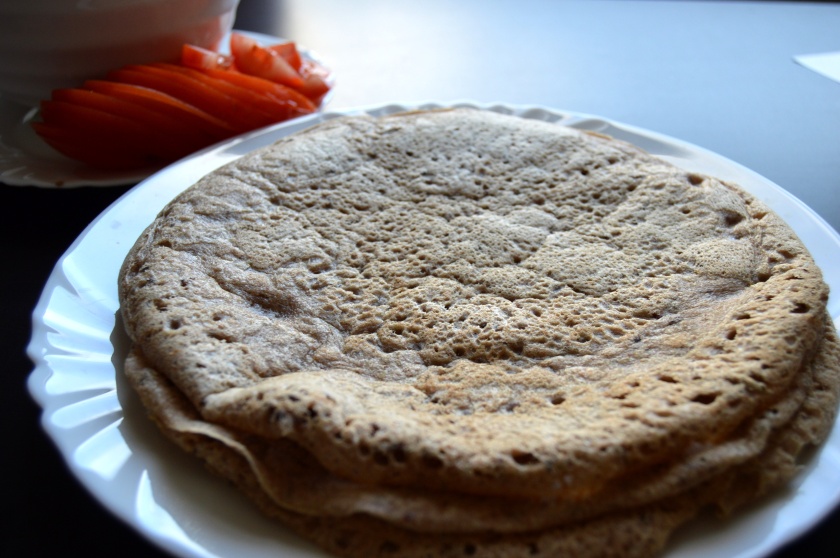
Saturday morning is pancake morning in our house, which is one of the reasons I look forward to the weekend so much. Usually, I go for regular savoury buckwheat pancakes (which are also called galettes) because I just love the taste of buckwheat!  But the regular galette recipe calls for eggs and I’ve been feeling a bit negative about eggs lately, somehow they just don’t agree with me.  So this Saturday I decided to replace the eggs in the pancakes with some other ingredients and tweak the recipe a bit and the end result blew my mind!  The pancakes turned out to be rather like delicious tasting, very flexible gluten free wraps.  And here I’ve experienced a bit of an epiphany – I’ve been on the lookout for a good gluten free wrap recipe that doesn’t crack and is soft and flexible until I’ve myself have created one by accident!

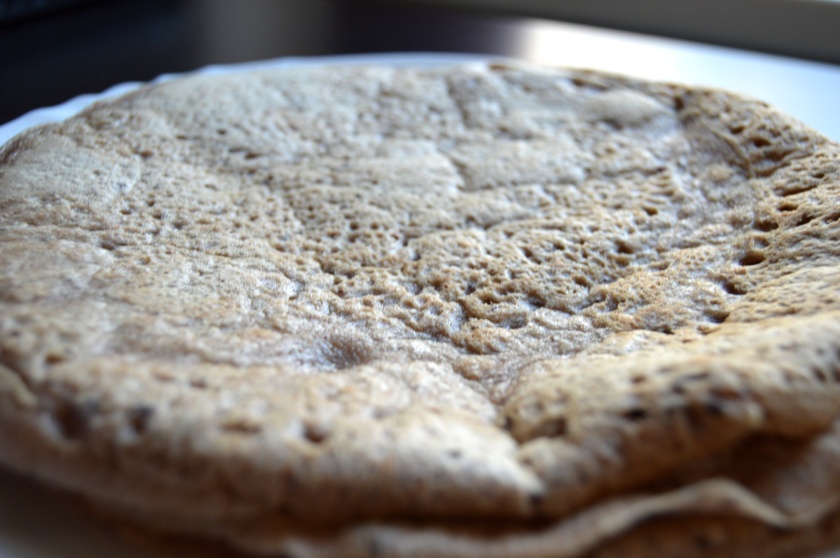
The wraps have a slightly nutty taste, thanks to the addition of linseeds and chia seeds.  They are also much softer and fluffier than a regular galette because I’ve added a pinch of soda to the dough.

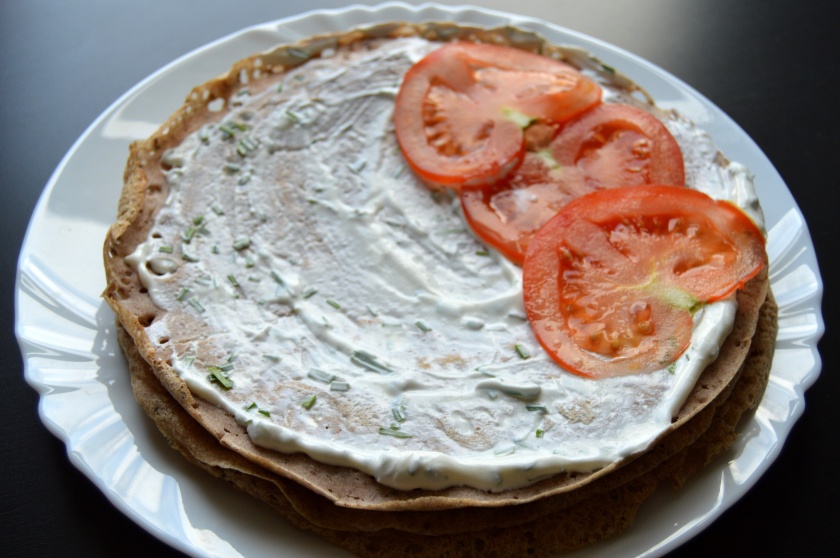
I’ve spread some sour cream mixed with chopped garlic chives on top of each wrap and then added some sliced tomatoes.  So simple but so morish and delicious!

I’ll be so happy if you try it and let me know how it turned out!

RECIPE:

  • 1 cup of buckwheat flour
  • 1 tbsp of crushed linseed
  • 1 tbsp of chia seeds
  • 2/3 cups to 1 cup of warm water
  • pinch of salt
  • pinch of baking soda
  • cooking oil

METHOD:

  • Mix the linseed and chia seeds the warm water.  Set aside and let it become a bit jelly-like.
  • In a large bowl, add in the flour, salt and baking soda.  Slowly add in the liquid mixture and beat with a whisk.  The texture should be that of a quite thick but still runny custard.
  • Set aside for 10 minutes.
  • Put some cooking oil  on a pan and, when hot enough, add a ladle of the dough and spread around the pan.  Fry for about 2-3 minutes until the top of it stops being shiny, then turn and fry for a further 1-2 minutes.  Repeat with the rest of the dough.

DSC_0041DSC_0034DSC_0037

Coronation Chickpeas [VEGAN]

dairy free, snacks, vegan

Sandwich 2

I have this thing about making my boyfriend foods that I loved thoughout my life before I met him.  But because he is a vegetarian who doesn’t eat dairy, I have to come up with alternatives.  Same goes for coronation chicken.
A little background here.  Coronation chicken was a dish that was created by the founder of Le Cordon Bleu to celebrate the coronation of Queen Elizabeth in 1953.  Over years though, Poulet Reine Elizabeth, as it was originally called, has experienced a massive decline in popularity.  Coronation chicken barms and sandwiches are now served throughout most canteens in the UK schools but while many might hate it, I have quite fond memories of eating it on my school lunch breaks while living in the UK.
For this recipe, I replaced the chicken meat with chickpeas and the result was astounding.  This version is a far cry from the plain, greasy canteen version and it’s bursting with flavours. And let me tell ya, I’m pretty sure this is going to be your new favourite vegan/vegetarian sandwich spread.

RECIPE:

  • 2 cups cooked chickpeas (you can use canned ones, just drain them first)
  • 1 medium onion (I used a red one but use whichever onions you have on hand)
  • handful of raisins
  • 6 dried apricots halves
  • 6 dried prunes
  • 2/3 cups vegan mayonnaise (I make mine at home with soy milk but you can replace mix it 50-50 with soy yoghurt to reduce fat)
  • 2 tsp of English curry (just a plain, old, basic non-spicy curry)
  • salt to taste

METHOD:

Soak your raisins, apricots and prunes in some hot water.  After about 5 minutes take them out, dry them and chop them roughly.
Heat some oil in a frying pan and add in your chopped onions.  Fry until translucent and then add in your raisins, apricots and prunes.  Fry for a further 5 minutes on medium heat.
In a bowl, mash up half of your chickpeas and then mix the mashed mixture with the remaining whole chickpeas.  This will add some interesting texture to the dish.
Add your fried onion, raisins, apricots and prunes to the chickpeas.  Mix.  Add in your mayonnaise and your curry powder.  Mix until well combined.  Put it in the fridge and let it cool.
Spread over bread, baked potatoes or use as a dipping for chopped veggies.

Pack it for your lunch to work or school or take it on a trip with you.  Honestly, unpacking a great sandwich from a brown paper wrap is the most pleasant thing (so retro!)

Enjoy,
Jalia

Coronation chickpeas

Sandwich 1

Gluten free Indian inspired potato pancakes with melted ghee

ayurveda, gluten free, vegan

PLACKA (2)

Any Indian food lovers out there?  This one’s for you.

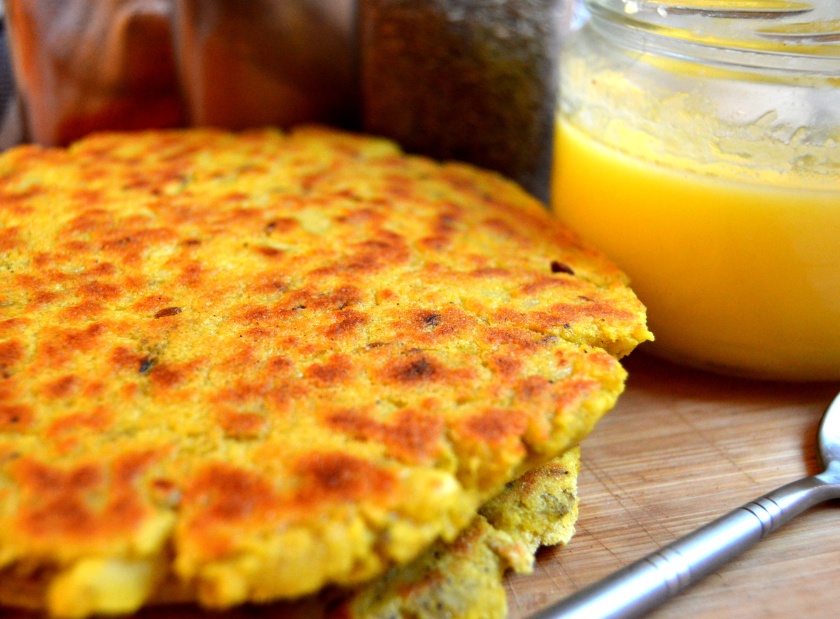
I was craving potato pancakes last night but as I am on an Indian cooking craze right now I decided skip the regular pancakes and try out something new and came up with these Indian-style potato pancakes!  These are delicious warm or cold, just brush with a bit of ghee and enjoy just on their own or with a chunky mango chutney, soup or salad.  The fragnance of Indian spices and melted ghee are so comforting, kind of like a warm blanket wrapping around you on a chilly summer evening.

RECIPE:
(makes 6 pancakes)

  • 5 medium sized potatoes, peeled
  • 2 cups corn flour
  • 1/2 cup rice milk
  • 2 eggs (replace for flaxseed if vegan – 1 egg=1 tbsp ground flaxseed + 3 tbsp water)
  • 1 tbsp of ghee plus extra for brushing
  • 1 tsp of salt
  • 1 tsp of black pepper
  • 2 tbsp of cumin seeds
  • 1 tbsp of coriander
  • 1 tsp of tandoori masala or any other Indian spice blend that you prefer

METHOD:

Put the peeled potatoes into a pot with some water, cover with a lid and boil until the potatoes are soft.  Drain the liquid and mash the potatoes with a potato masher.
To the potatoes add the rice milk, eggs, a tbsp of ghee, salt, pepper and the spices and mix through until all is well combined.  Gradually add the corn flour, mix until it forms a dough.
Divide the dough into 6 balls.
Heat a non-stick pan over medium heat.  Flatten one ball of the dough with your hand and put it on the pan.  Let it dry fry for 2-3 minutes on each side until it’s slightly browned.  Remove from the pan and put it on a plate.  Brush with some ghee.  Repeat with the other pancakes and stack them on top of each other, brushing each one with ghee.

Hope you will enjoy the recipe, write me a comment and tell me what you had your pancake with and whether you liked it!
Wishing you good health,
Jalia